Procedural Speed Trails & Burn Effects in Blender: A Shader VFX Tutorial
[BY]
Tahmid Khan Alim
[Category]
Tips & Tricks
[DATE]
Jan 7, 2026

Learn how to create dynamic anime-style speed trails and burn effects using Blender shader nodes. A step-by-step VFX tutorial from the artists at FireDrum Studios.
Introduction
If you’ve ever watched high-octane anime or played a fast-paced action game, you know that speed isn't just about motion—it’s about distortion. It’s that searing streak of light left behind by a sword swing or a spaceship thruster. At FireDrum Studios, we love stylized VFX, and one of the most powerful ways to achieve this look isn't with heavy particle simulations, but with clever shader math.
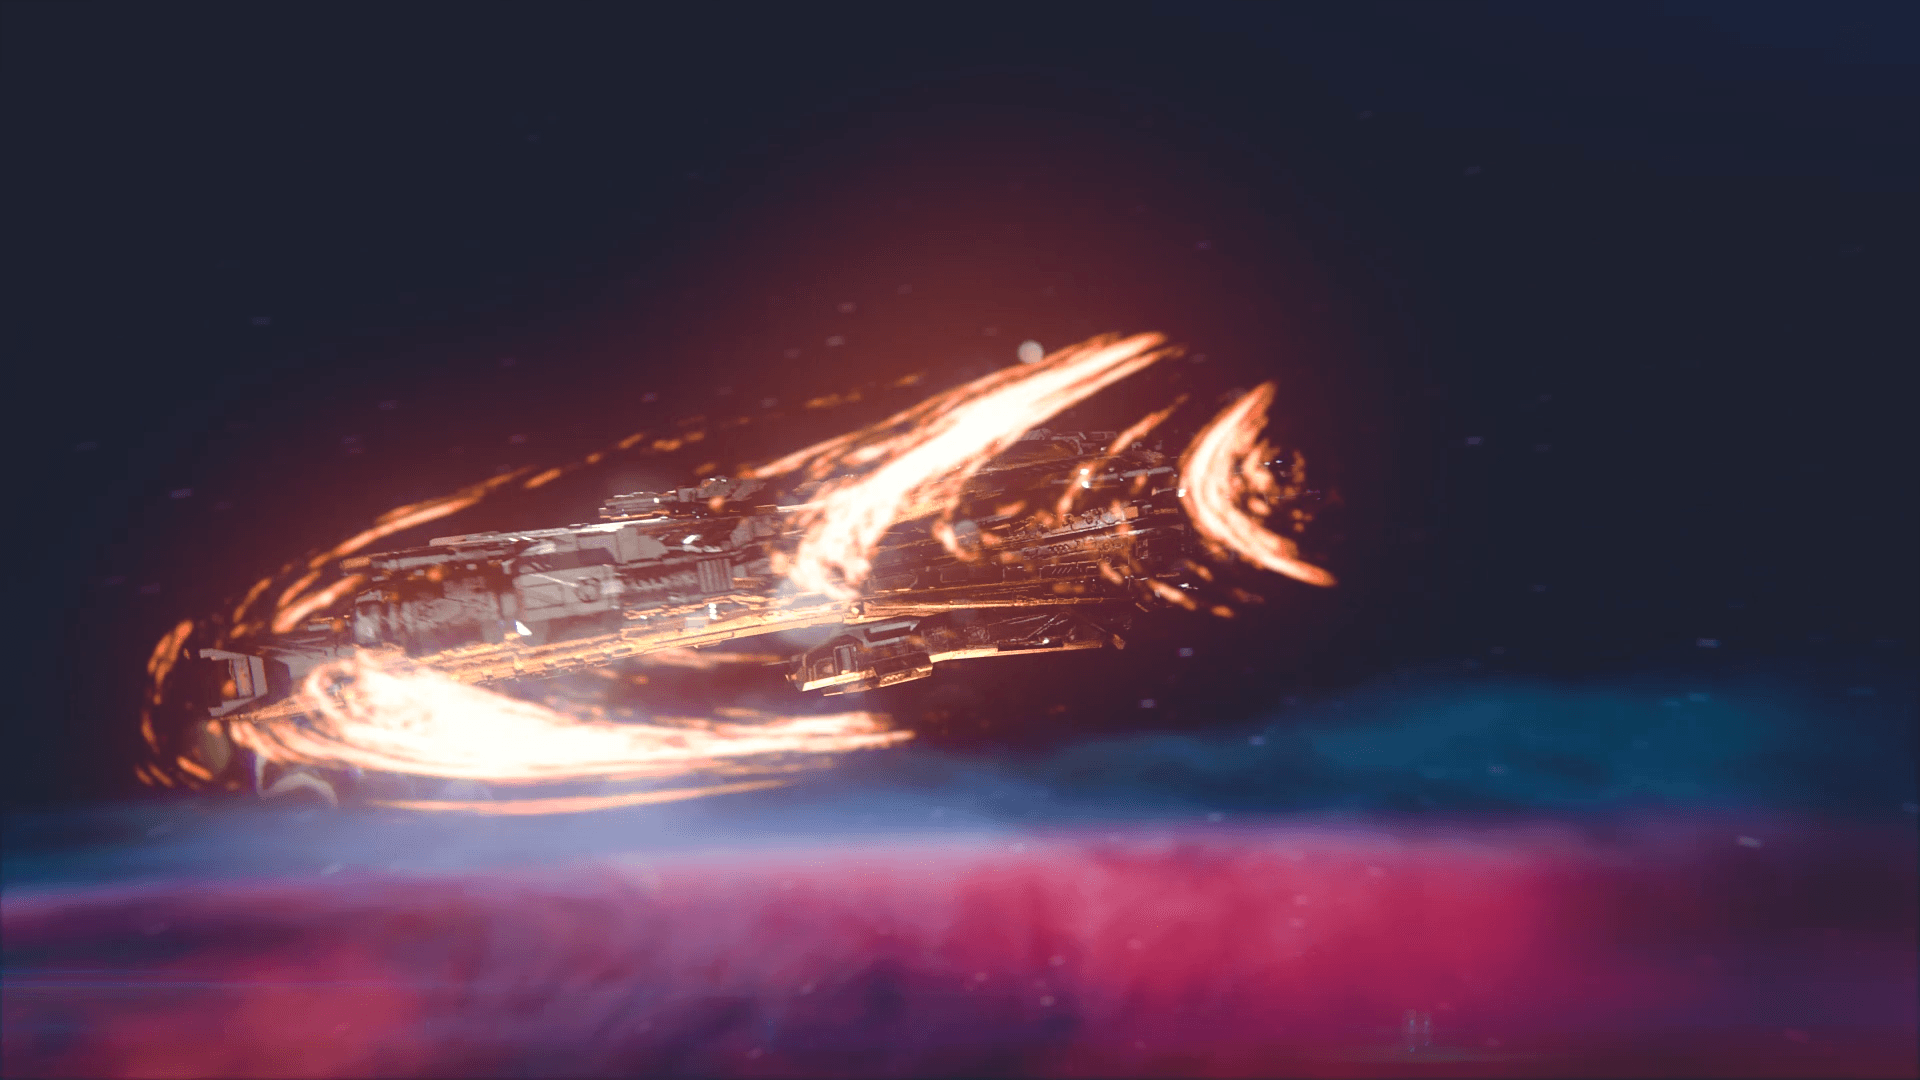
Today, we’re pulling back the curtain on a technique we often use for rapid prototyping and stylized motion: the Procedural Speed Trail.
This isn't about baking textures. It's about building a living, breathing shader that reacts to your animation. Whether you're a 3D artist in Bangladesh or a VFX enthusiast across the globe, mastering the Mix Shader factor is a superpower. Let’s dive into the nodes and set this thing on fire.
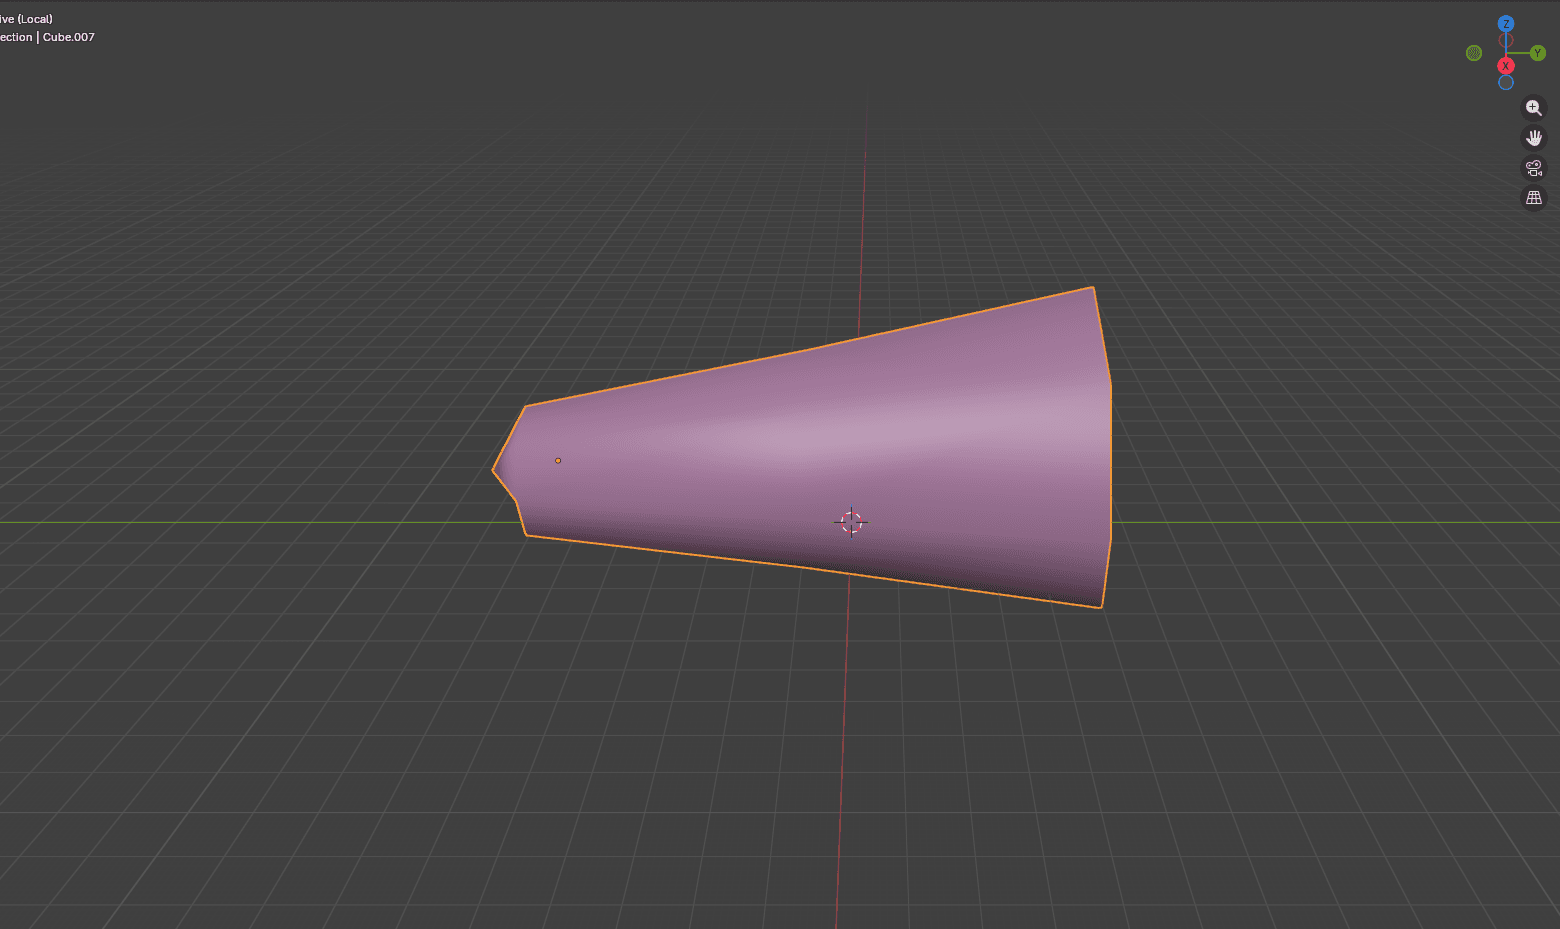
The Geometry: Starting Simple
Before we touch a single node, we need canvas. A complex effect doesn't need a complex mesh; it needs a smart mesh.
1. Create the Base Shape
Start with a simple shape that mimics the volume of your trail. A cone usually works best for thrust or sword slashes.
Add a Cone or Cylinder.
Delete the end faces (cap fills) so it’s a hollow tube.
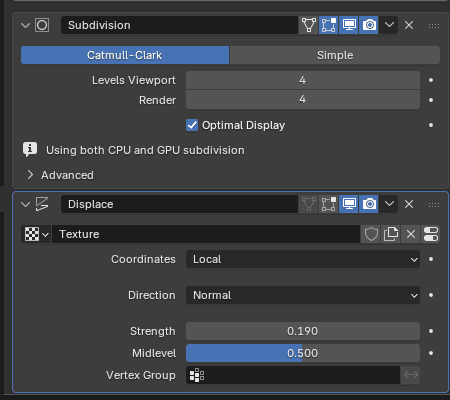
Crucial Step: Add a Subdivision Surface modifier. We need plenty of geometry because we are going to displace it later.
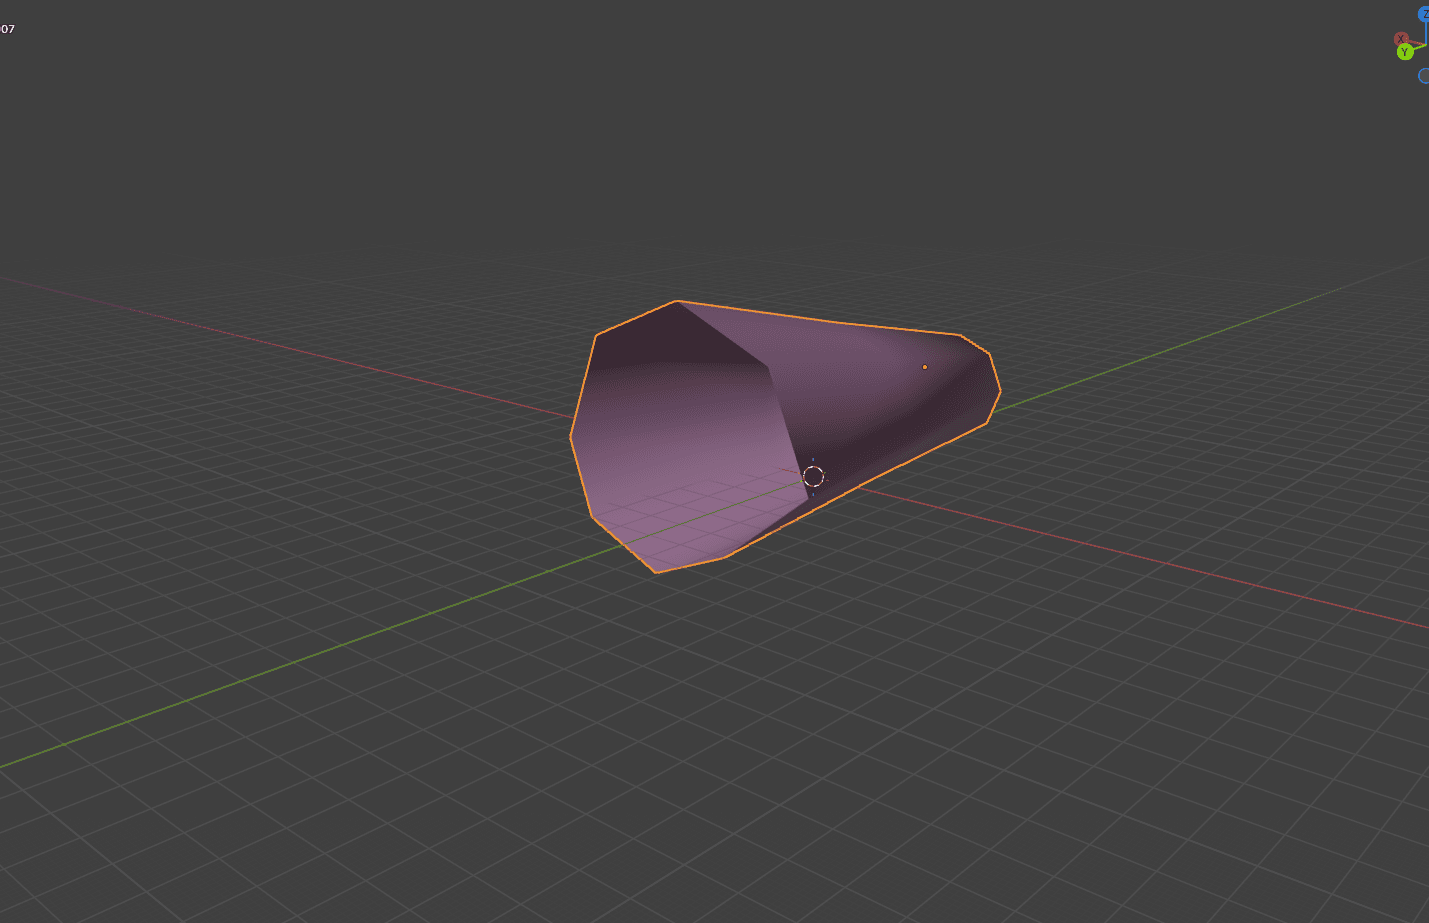
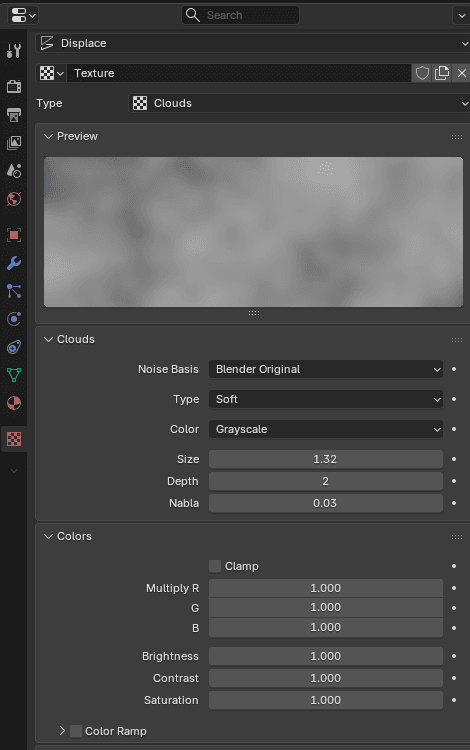
2. The Displace Modifier (The Secret Sauce)
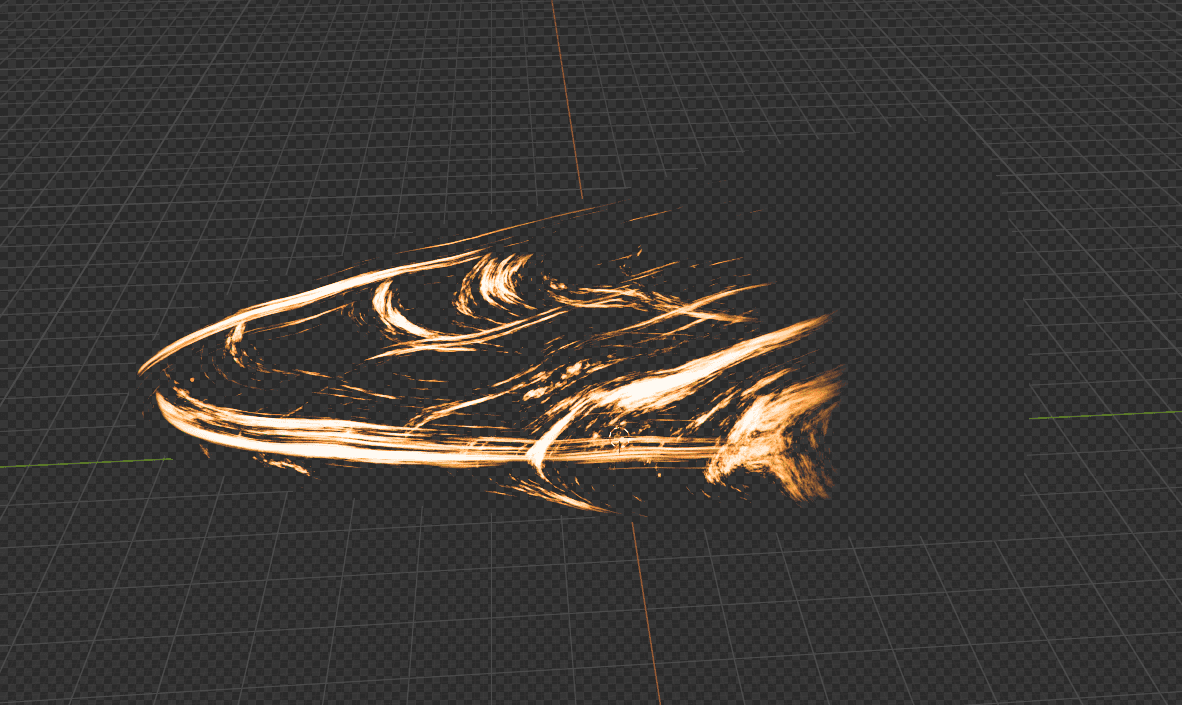
Looking at the final result, you'll see the mesh isn't smooth—it's jagged and energetic.
Add a Displace Modifier.
Create a new texture and set it to Clouds.
This physically distorts the mesh, giving the shader a chaotic surface to cling to.
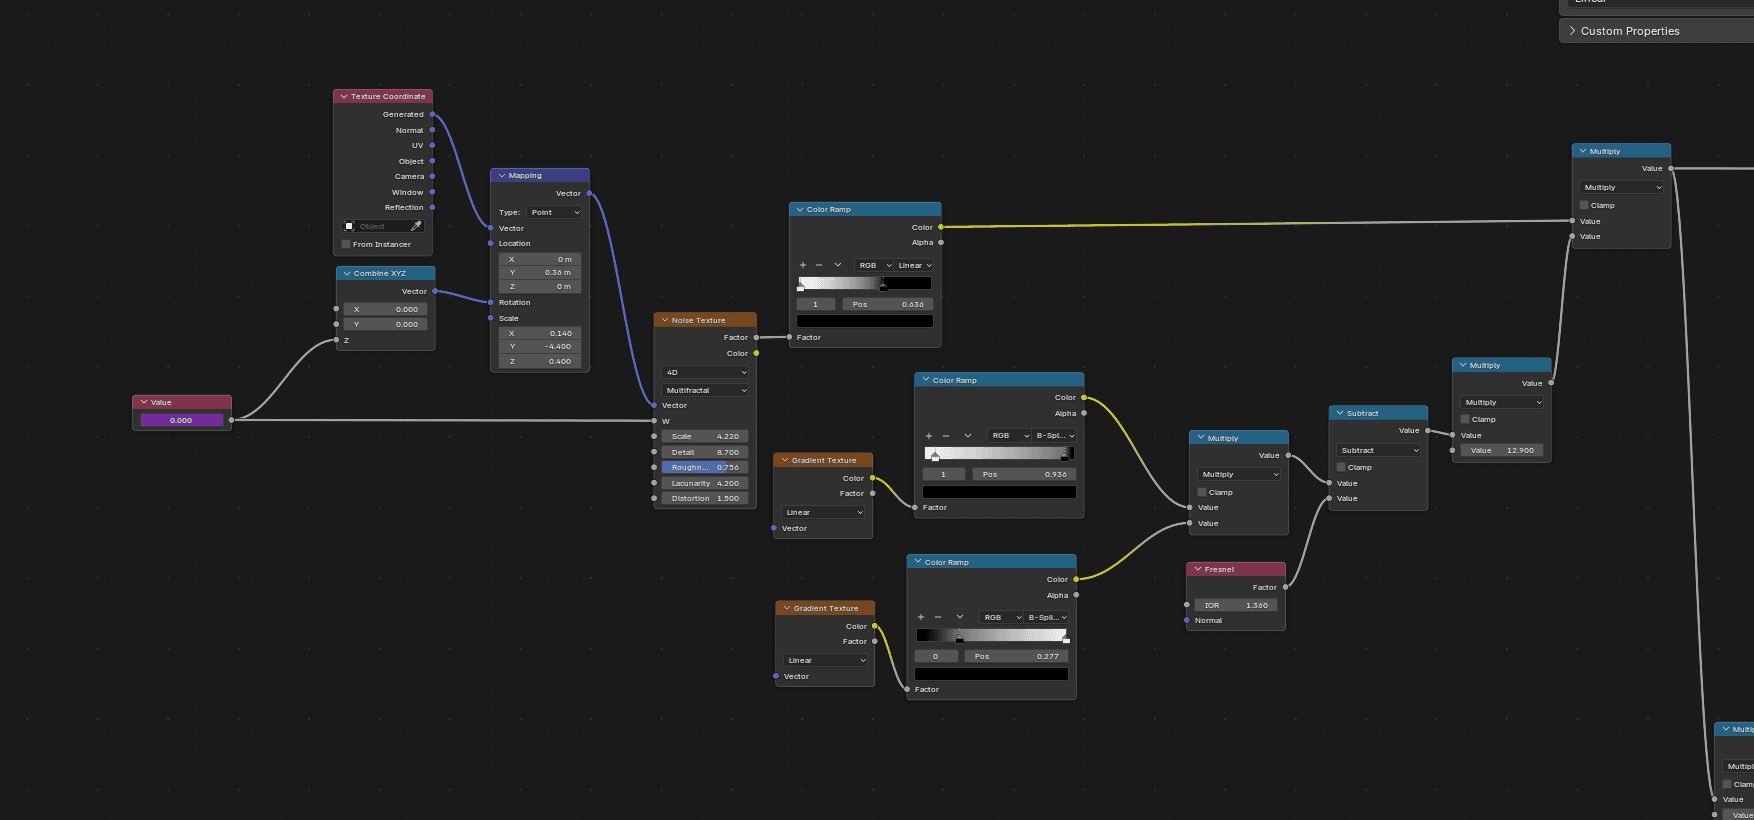
The Shader: Controlling the Invisible
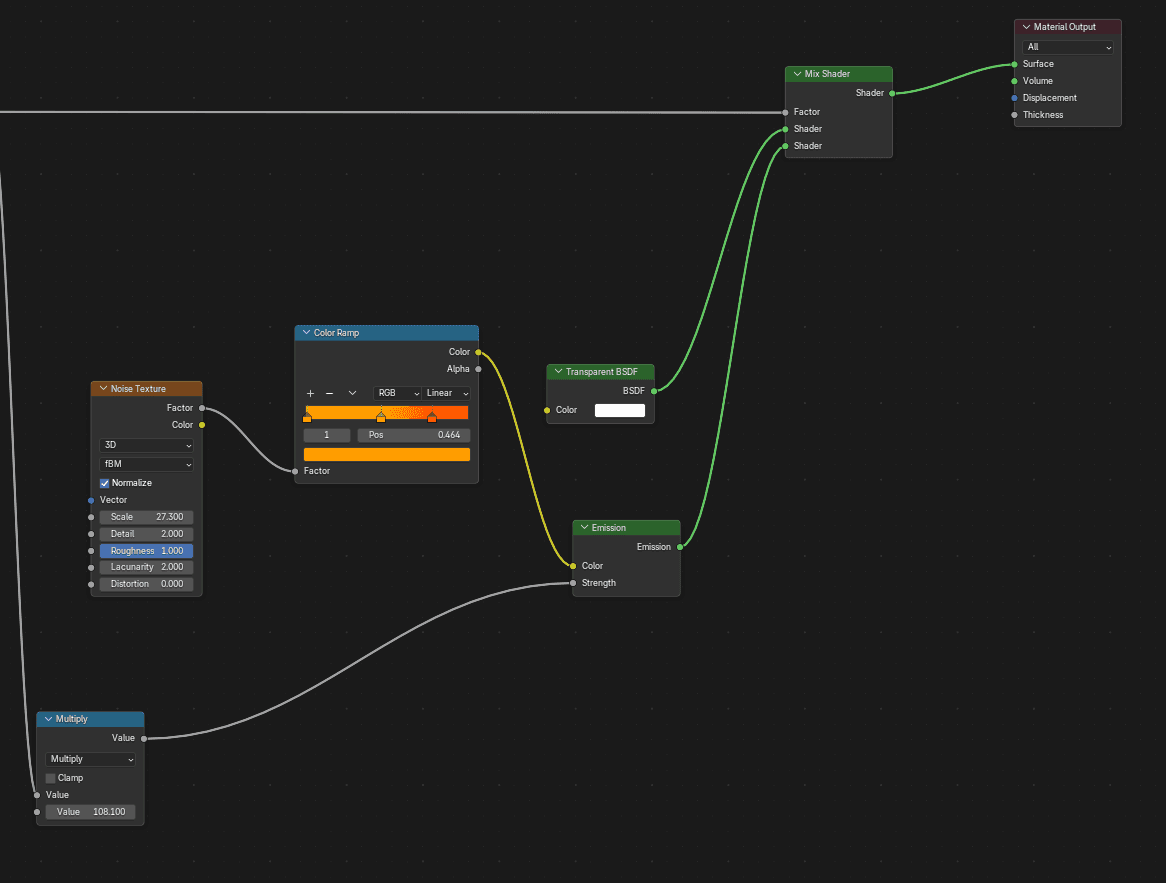
Now, open the Shader Editor. This is where the magic happens. We aren't using the standard Principled BSDF here. For stylized VFX, we need raw control over light and transparency.
Step 1: The Foundation
Delete the Principled BSDF. We need to mix between "invisible" and "bright light."
Add a Transparent BSDF.
Add an Emission BSDF.
Connect them both to a Mix Shader.
Right now, the mesh is either fully ghost or fully flat. The goal is to control the Factor input of that Mix Shader.
Step 2: The Noise (The Chaos)
We want the trail to look organic, not like a plastic cone.
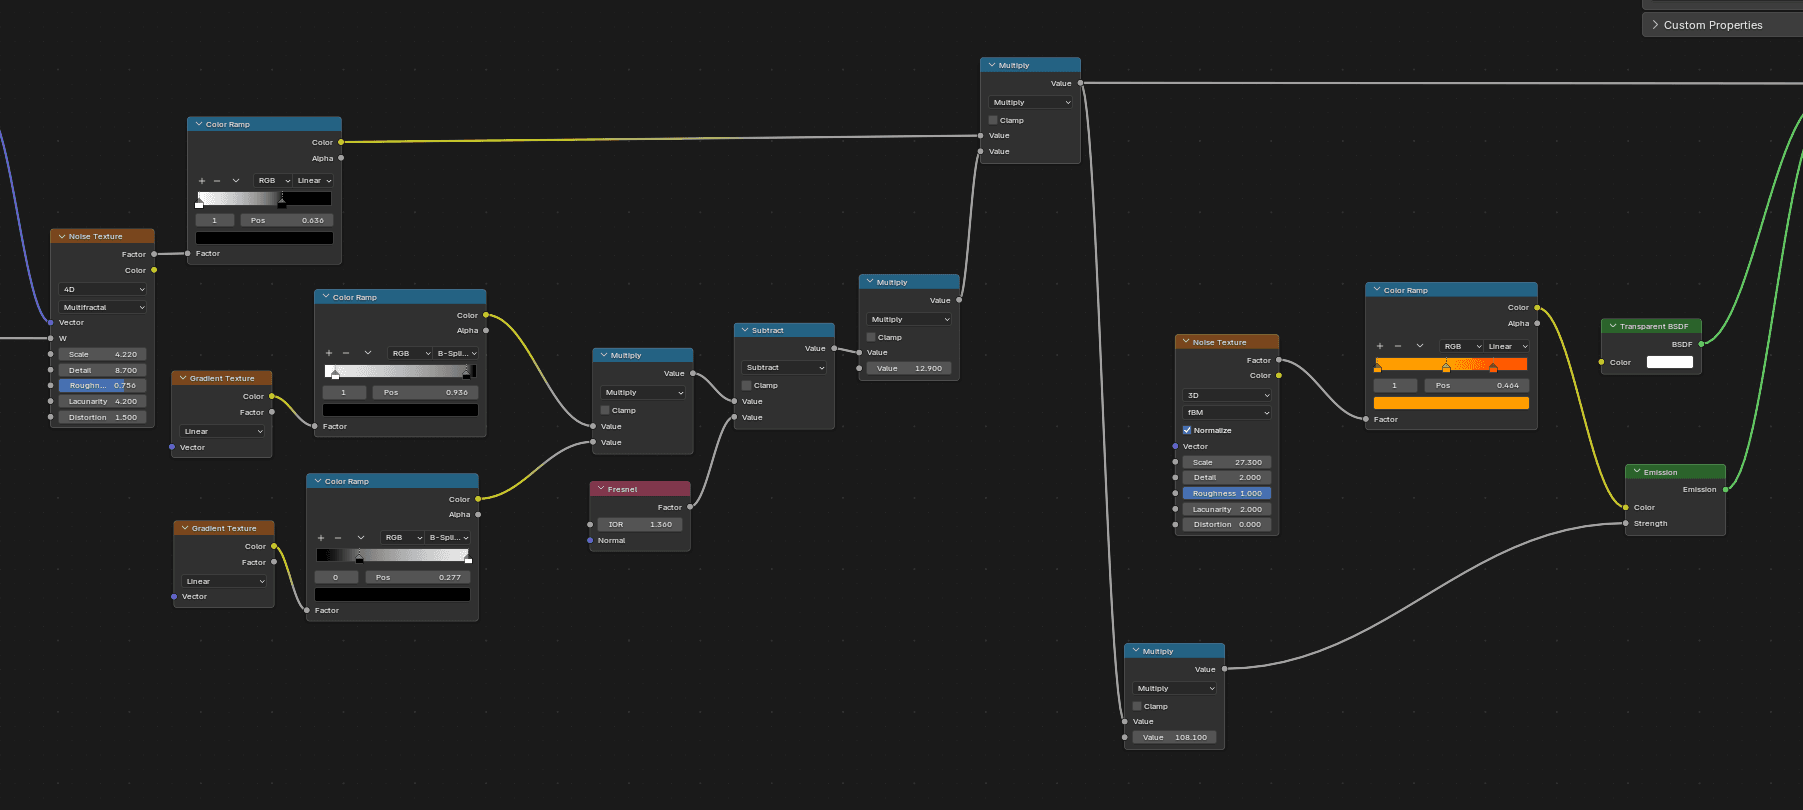
Add a Texture Coordinate node (use Generated coordinates so the texture fits the bounding box).
Connect it to a Mapping node.
Feed that into a Noise Texture.
This noise is the DNA of your effect. It tells Blender, "Show the mesh here, but hide it there."
Step 3: The Masking (The Control)
If you just plug the noise into the factor, it looks like random static. We need to guide it. This is where the "Math" comes in.
Gradient Textures: Add two Gradient Textures. Use these to mask the front and back of the trail. You want the effect to fade out at the tail and perhaps stay transparent at the very source (the emitter).
Fresnel: Add a Fresnel node. This calculates the angle of the mesh relative to the camera. By mixing this in, you ensure the edges of the trail are more visible than the center, giving it that volumetric, "hollow energy" look.
Combine them: Use Math Nodes (Multiply) to combine your Noise, Gradients, and Fresnel.
This chain creates your Alpha mask. Plug final output into the Mix Shader Factor.
Coloring and Animation
A grey trail is boring. Let’s make it burn.
The Color Ramp
Take that same Noise Texture setup we used for the alpha and branch it off into a Color Ramp.
Set the colors to a fiery gradient (Black -> Orange -> Yellow -> White).
Plug this into the Color input of the Emission BSDF.
Pro Tip: Crank up the Emission Strength (try 20 or 50) to get that nice bloom effect in by enabling glare node from compositing.
Bringing it to Life (Drivers)
A static trail looks frozen. We need it to flow. We do this by animating the texture coordinates without setting manual keyframes.
1. The 4D Noise Trick
Change your Noise Texture from 3D to 4D. This gives you a W input, which evolves the noise pattern over time.
In the
Wfield, type#frame/25.This is a Driver. It tells Blender: "Take the current frame number, divide it by 25, and use that value." As you play the timeline, the fire ripples automatically.
2. Flow Direction
To make the fire streak backwards (mimicking speed), we need to move the texture along the object.
Go back to your Mapping Node.
In the Location or Rotation Z-axis, add a driver like
#frame/10.Now, the noise texture physically slides along the cone, selling the illusion of high speed.
Why This Method? (The FireDrum Perspective)
At FireDrum Studios, we often choose procedural shaders over particle simulations for a few reasons:
Iterative Speed: Client wants blue fire instead of orange? It’s one Color Ramp change. No re-simulating caches.
Performance: This is incredibly lightweight compared to millions of particles.
Art Direction: You have absolute control over the shape. If you model a spiral mesh, the fire spirals. If you model a sword arc, the fire follows the blade perfectly.
Conclusion
Creating high-end VFX isn't always about the most expensive plugins; it's about understanding how to manipulate data. By combining a simple Mix Shader workflow with Drivers, you’ve created an asset that is reusable, scalable, and looks fantastic in motion.
Whether you are working on a motion graphics piece for a local brand here in Bangladesh or an indie game for Steam, these procedural techniques will save you time and elevate your visuals.

